Forms and Areas
The Forms and Areas page lets you view and manage the evaluation and guidance structures used by the Intelligence Engine for Real-time Checklists and Autoscoring.
- Type: Identifies the item as a Score, Survey, or Checklist form. If this column is blank, the item is an Area.
- Used with Services/Forms: Indicates which services a form is assigned to, or which forms an area is assigned to.
Forms
A Form is the complete structure that the Intelligence Engine uses to either automatically score a completed interaction or provide guidance to an agent during a live interaction. By assigning forms to specific services, you can enable Autoscoring for quality management and customer satisfaction analysis, or you can create dynamic checklists on Activity Forms to guide agents in real-time.
All forms and areas use a weighted system to calculate scores. This system is flexible: different forms can use the same area but assign it a different weight, and different areas can include the same intent with different weights.
The primary difference between the form types is how they are used and where their data is displayed. Score and Survey forms function identically but are separated for clarity in reporting.
- Score Forms are typically used to evaluate an agent's performance. Once assigned to a service, their data can be displayed in Autoscoring Analytics dashboards.
- Survey Forms are typically used to measure customer satisfaction. Like Score forms, their data can be displayed in Autoscoring Analytics dashboards.
- Checklist Forms can be associated with the Activity Form of a given service, and their items can be displayed to agents as real-time guidance during an interaction. The analytics for these forms appear on the Real-Time Checklist Analytics page.
Areas
An Area is a reusable group of Intents that functions as a subsection within a form.
Each area contributes to the form's total score, and you can display area-specific scores on dashboards. This allows you to analyze both high-level and granular trends in agent performance or customer sentiment.
Calculating the Score of a Form
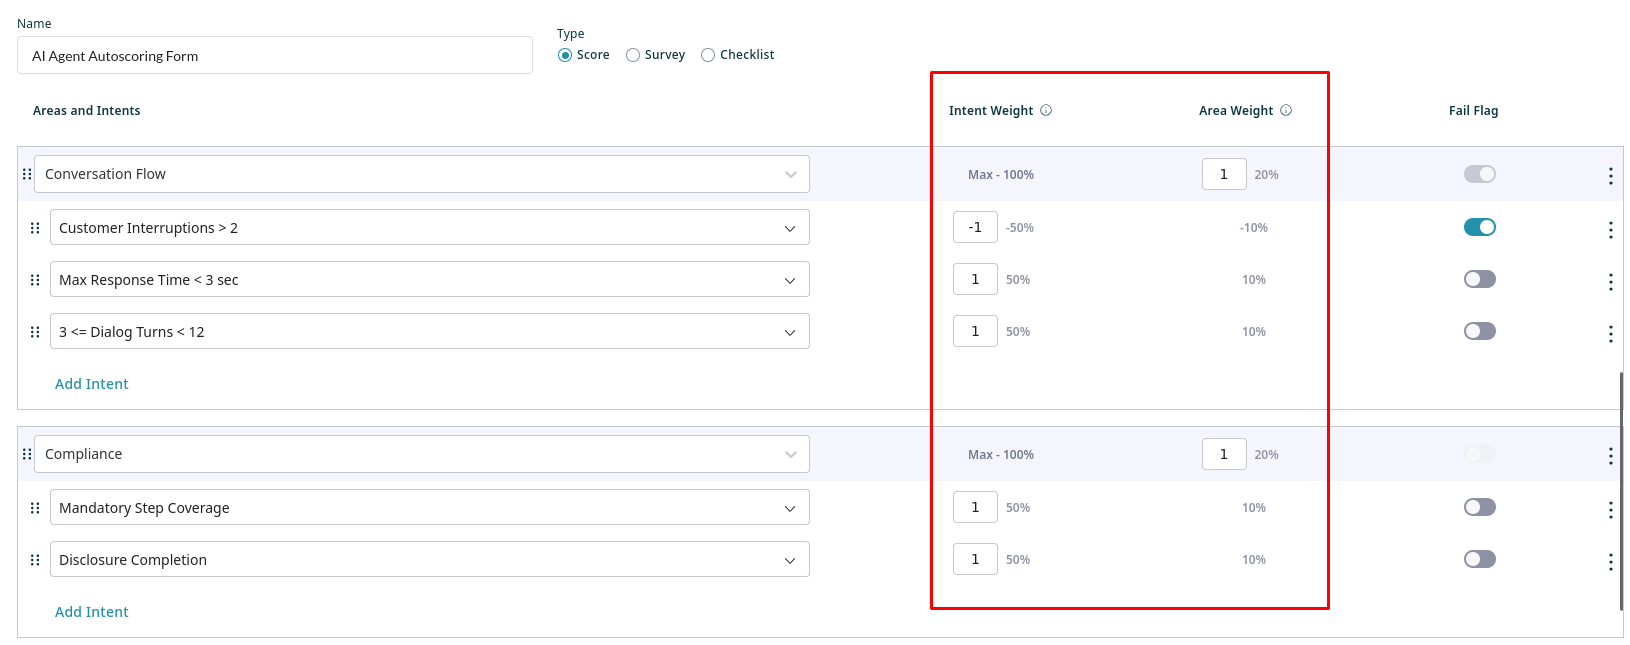
The scoring system is hierarchical: individual intents contribute to their area score based on their weight, and each area contributes to the final form score based on the weight assigned to the area. When creating a form, you can see how much each Intent and Area will contribute to the final score of the form.
The score for an area is determined by the following principles:
- Each intent is assigned a weight between
-100and100. To penalize the detection of an intent, assign it a negative weight.
- When an interaction is evaluated, the system sums the weights of all detected intents.
- This sum is then divided by the total possible positive score (e.g. the sum of all positive weights) in the area and multiplied by 100 to get the final area score. If this value is negative, the score for the area will be
0.
- If an intent marked with the Fail Flag is detected, the entire form will be marked as failed, regardless of whether other intents were detected.
The score for a form is calculated in a similar way, using the weighted scores of all of its areas.
Negative Weights
You can assign negative weights to intents that you want to penalize. However, the scoring system is designed so that the minimum possible score for any area or form is always 0. If a calculation results in a negative value, the score is automatically adjusted to 0.
Be aware that if you create an area that contains only intents with negative weights, the maximum possible score for that area will also be 0. This means the area will always score 0, regardless of which intents are detected, providing no meaningful data. To ensure you can gather useful analytics, any area that uses negative weights should also include at least one intent with a positive weight.
Intents with Preconditions
Some intents only apply if a specific precondition is met. If the precondition is not met during an interaction, the intent is skipped and its weight is completely excluded from the score calculation. This prevents an agent's score from being negatively affected by criteria that were not applicable to a specific interaction.
However, you should consider how this affects the scoring dynamics. When a conditional intent is excluded, the relative weight of the remaining intents in that area increases.
For example, consider an area with three intents, each with a weight of 1.
- If all are displayed, each contributes 33% to the area's total score.
- If one intent's precondition is not met, it is excluded from the calculation. The remaining intents now each contribute 50% to the area's score.
When calculating the score of a Checklist form, this same logic applies to any checklist item that is not displayed to the agent, whether it is hidden by its own Display Conditions or by a Conditional Section control.
Creating and Configuring a Form
1. Create the Form
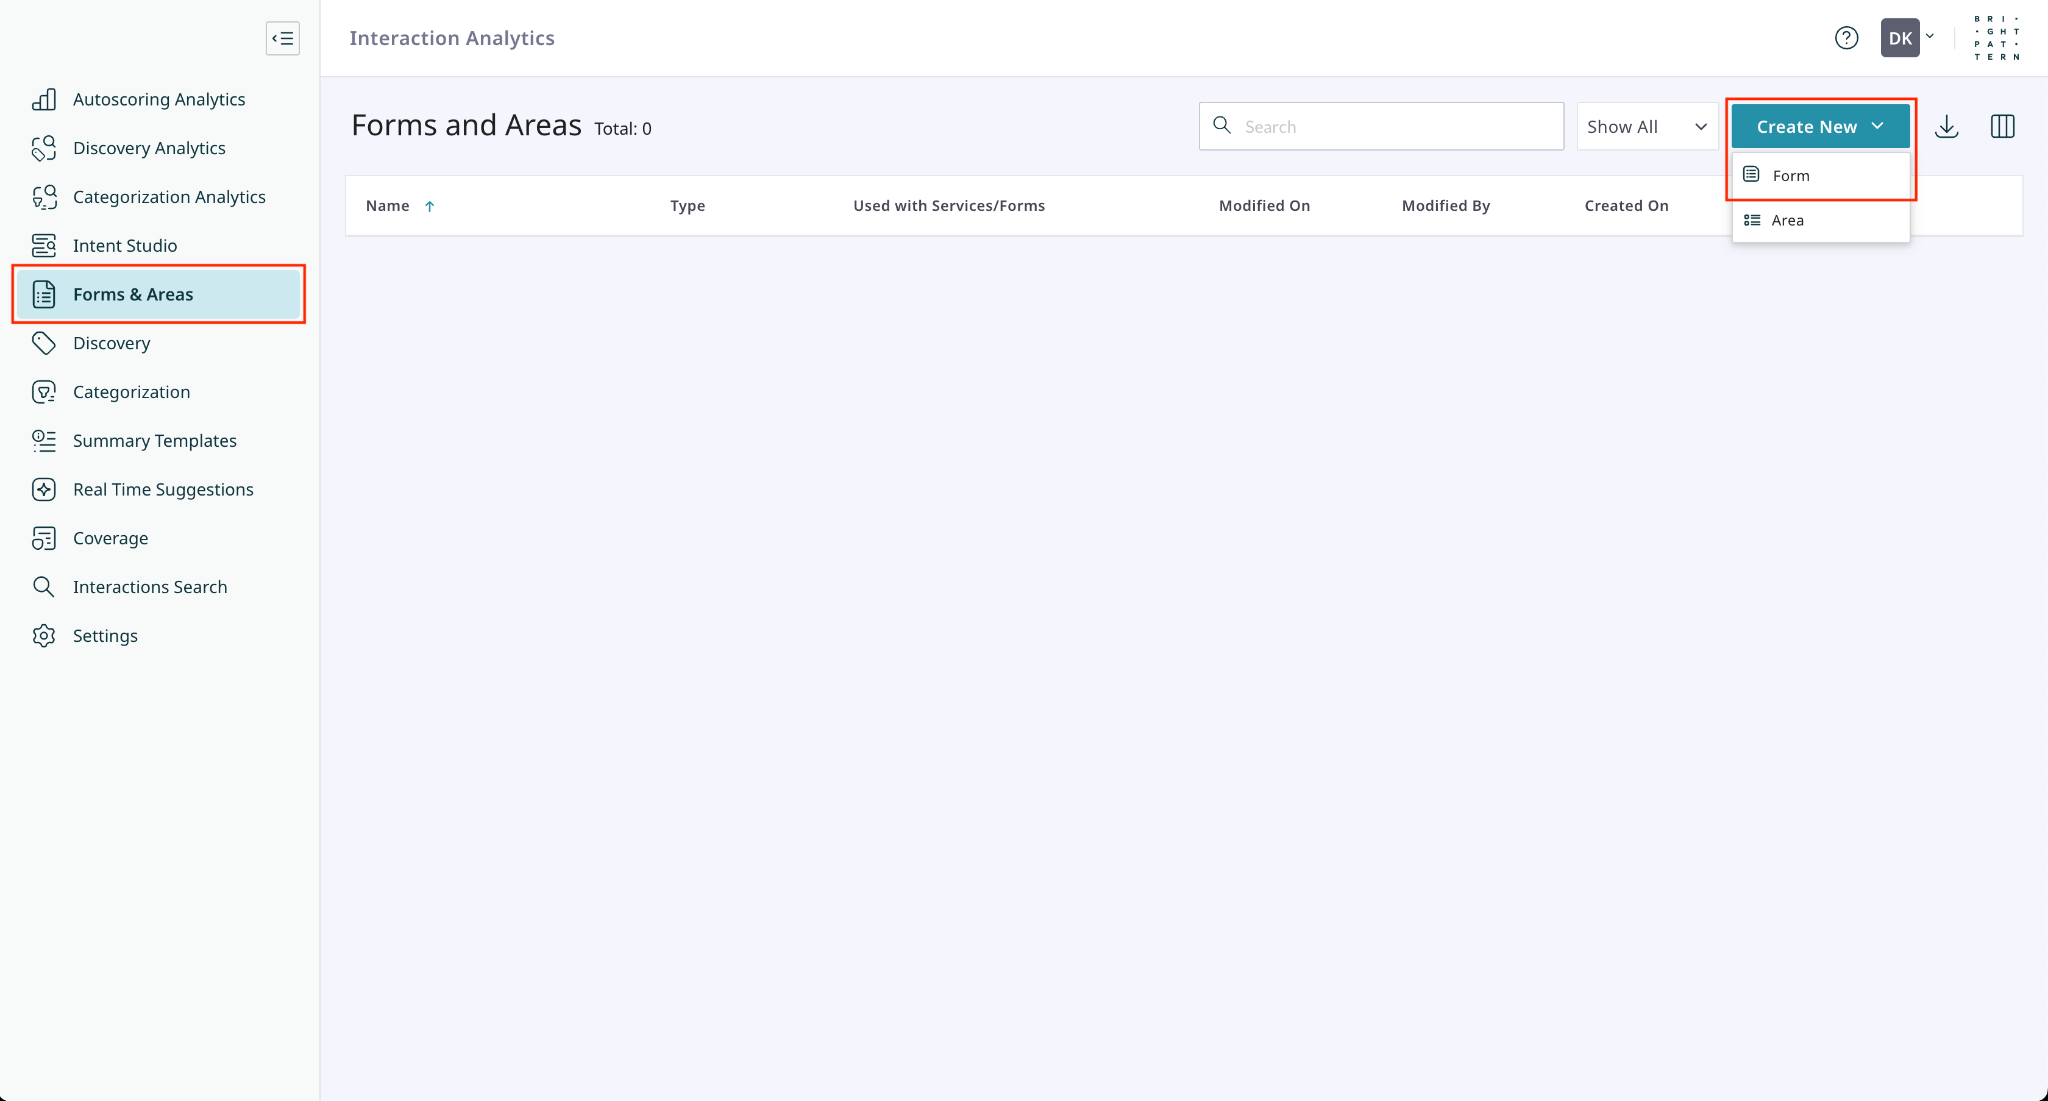
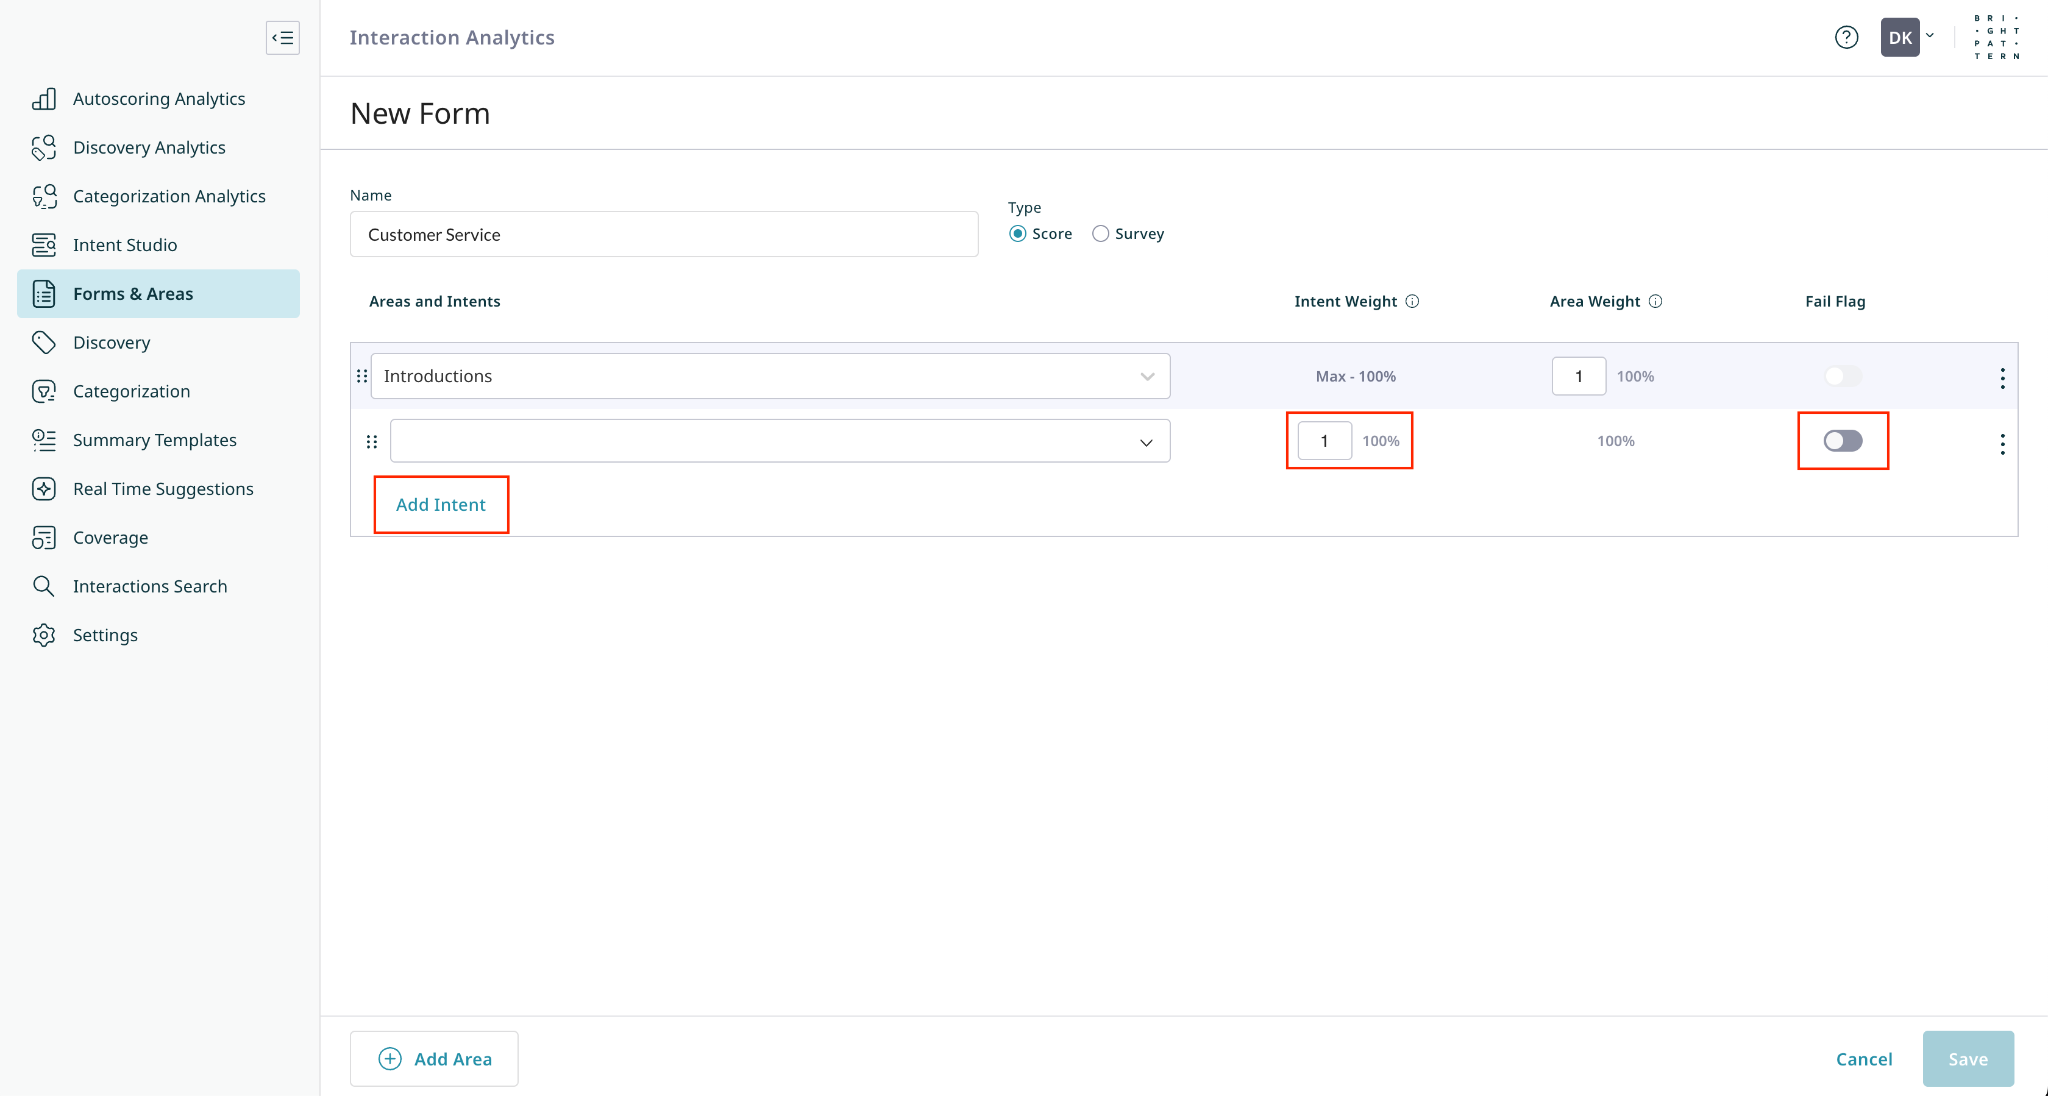
Navigate to the Forms and Areas page, click Create New, and select Form.
- Enter a descriptive Name, for example "Customer Service".
- Select the form type, either Score (to assess your agents’ performance), Survey (to assess customers’ experiences), or Checklist (to create a Real-Time Checklist for Activity Forms).
2. Add or Create Areas
Forms are constructed using Areas to group scoring criteria.
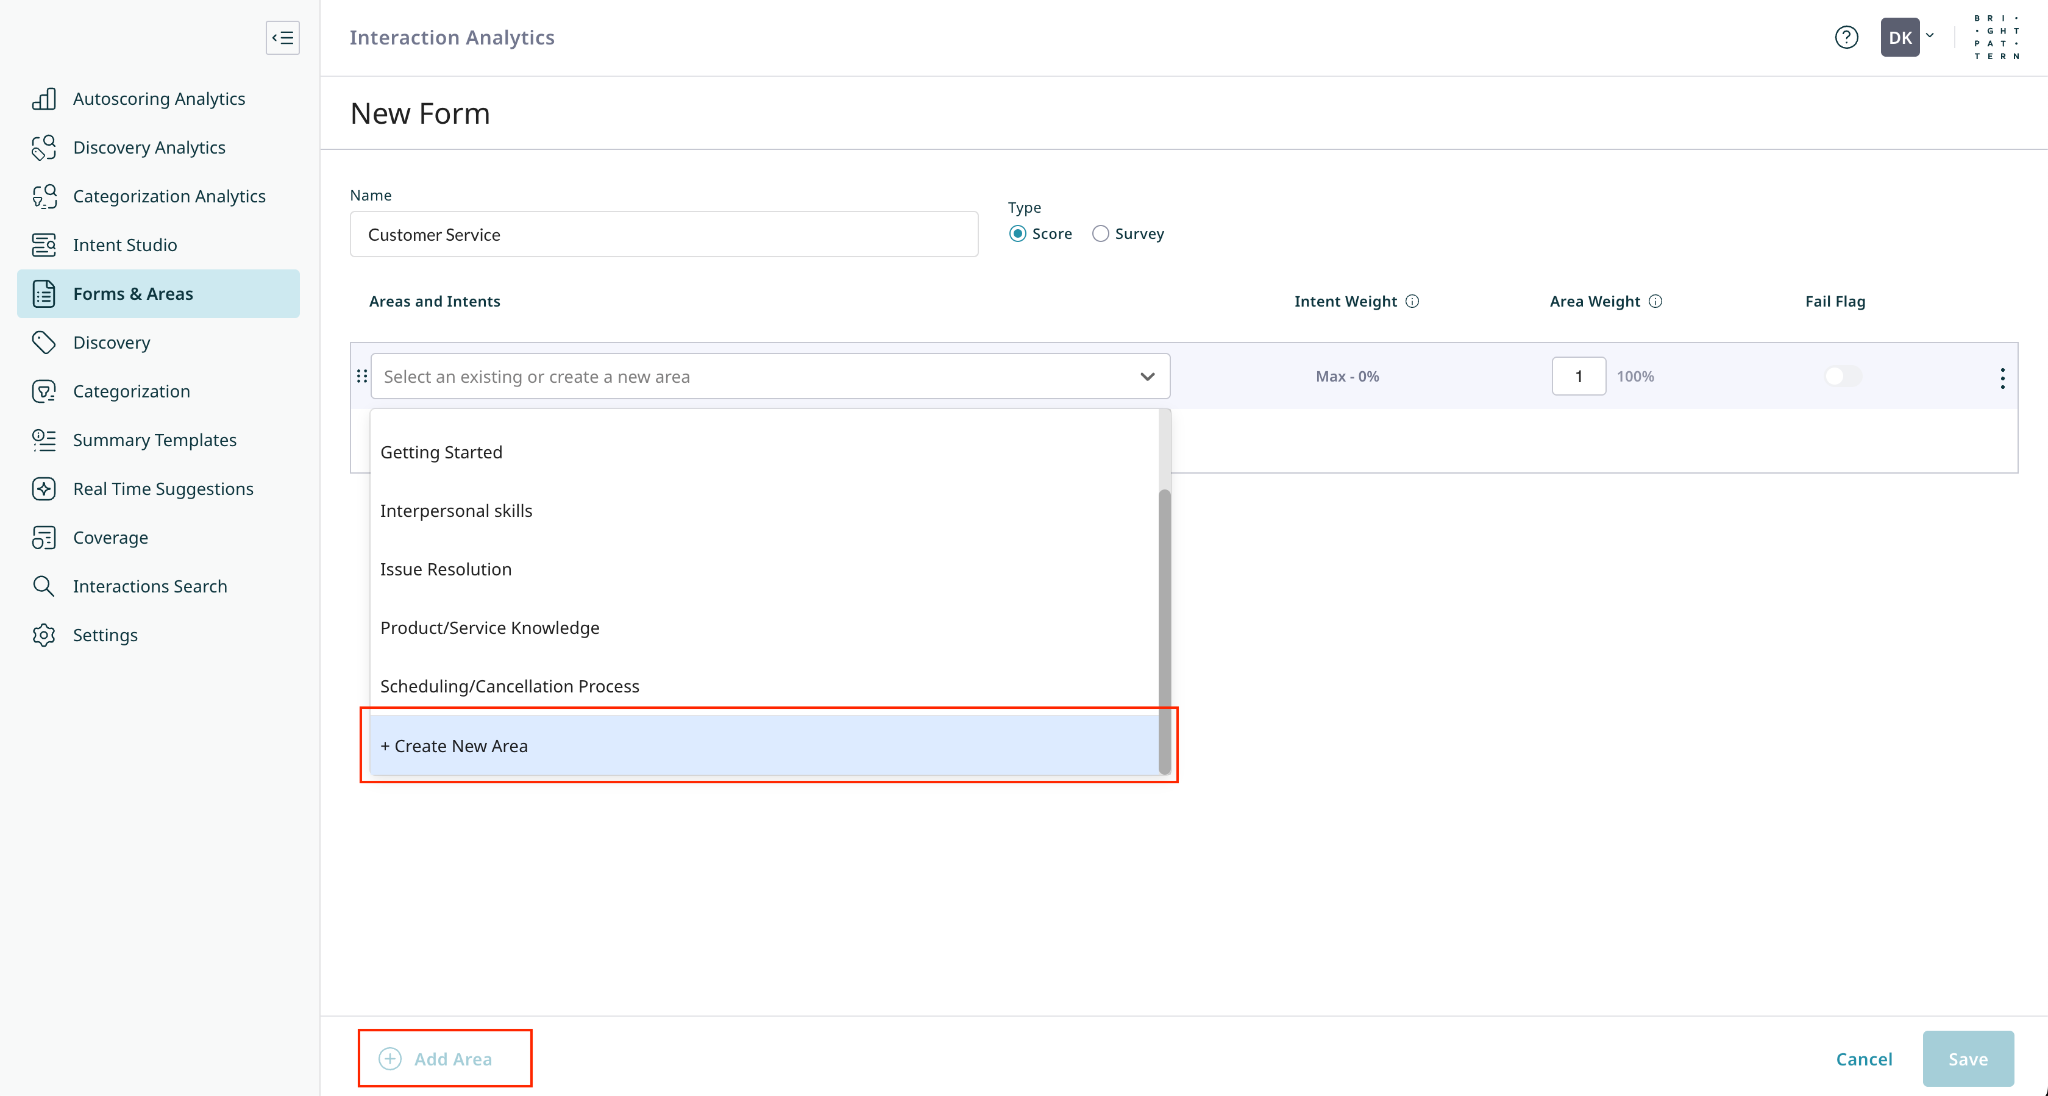
- To add an Area to the form, click the Add Area button at the bottom of the page.
- To populate the new area with Intents, select an existing area or create a new one by entering a name and selecting the + Create New Area button at the bottom of the dropdown.
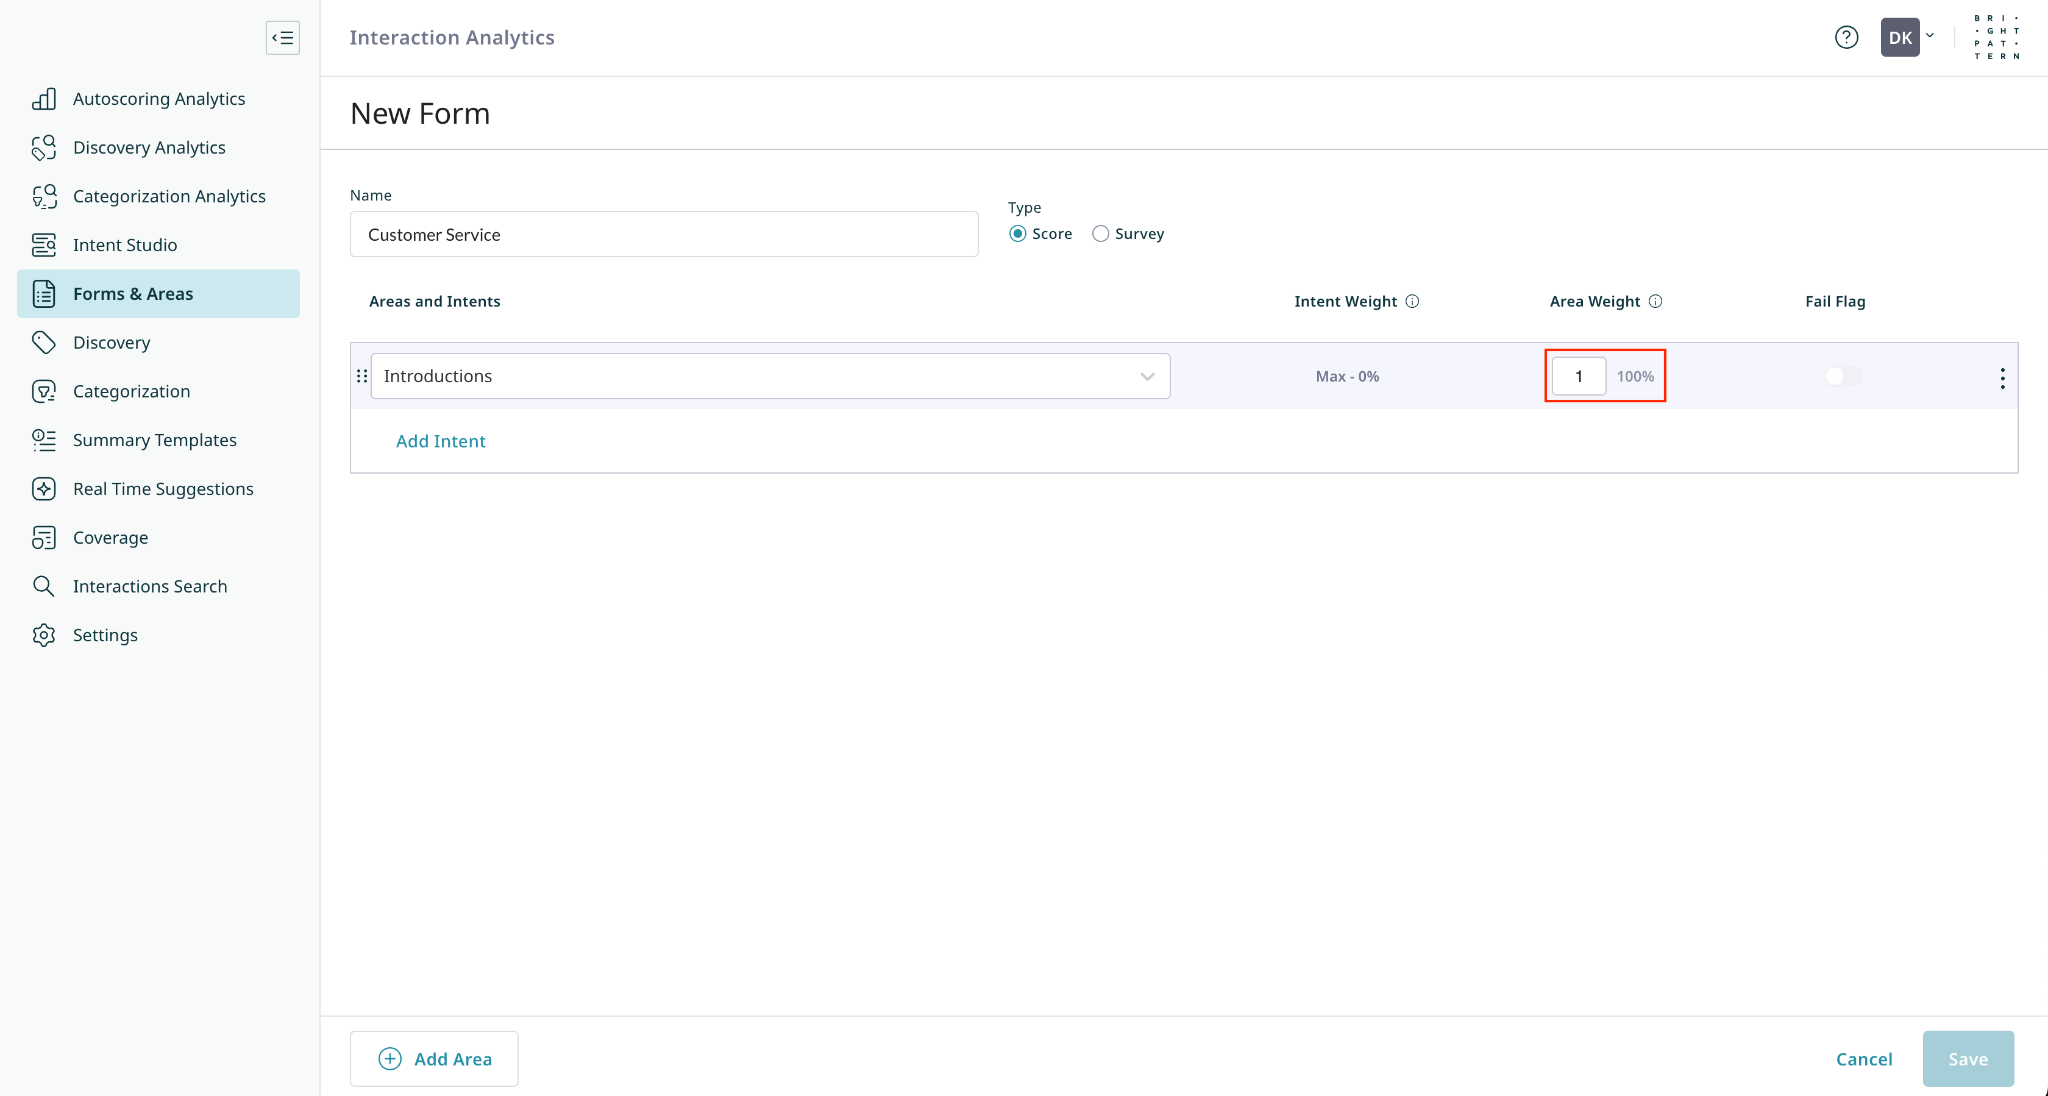
- Assign your areas a weight value (any number between -100 and 100) to control how much the area contributes to the form score.
3. Add Intents
Intents define the scoring criteria or are the items on the checklist.
- To add an intent to an area, select the Add Intent button at the bottom of the area block.
- Select an intent from the list of existing intents.
- Assign a weight value to your intent (any number between -100 and 100) to control how much the intent contributes to the area.
- Enable the Fail Flag to mark the entire form as failed if this intent is detected.
- Add as many areas and intents as needed, then click Save.
< Previous


