Scheduling
This tutorial describes how to generate, review, manually adjust, and publish agent shifts.
Prerequisites
Before generating shifts, ensure that:
- Agent data and skills are correctly set up in the Bright Pattern ACD (WFM pulls this data directly).
- Shift activities are configured
- Daily and Weekly shift templates have been created
- Forecasts for the relevant periods and skills have been published to the master forecast, which WFM uses to determine required staffing.
Procedure
The agent scheduling workflow typically includes these steps:
- Generate Shifts
- Review Schedule
- Manual Adjustments
- Re-optimize Breaks and Lunches
- Publish Shifts
1. Generate Shifts
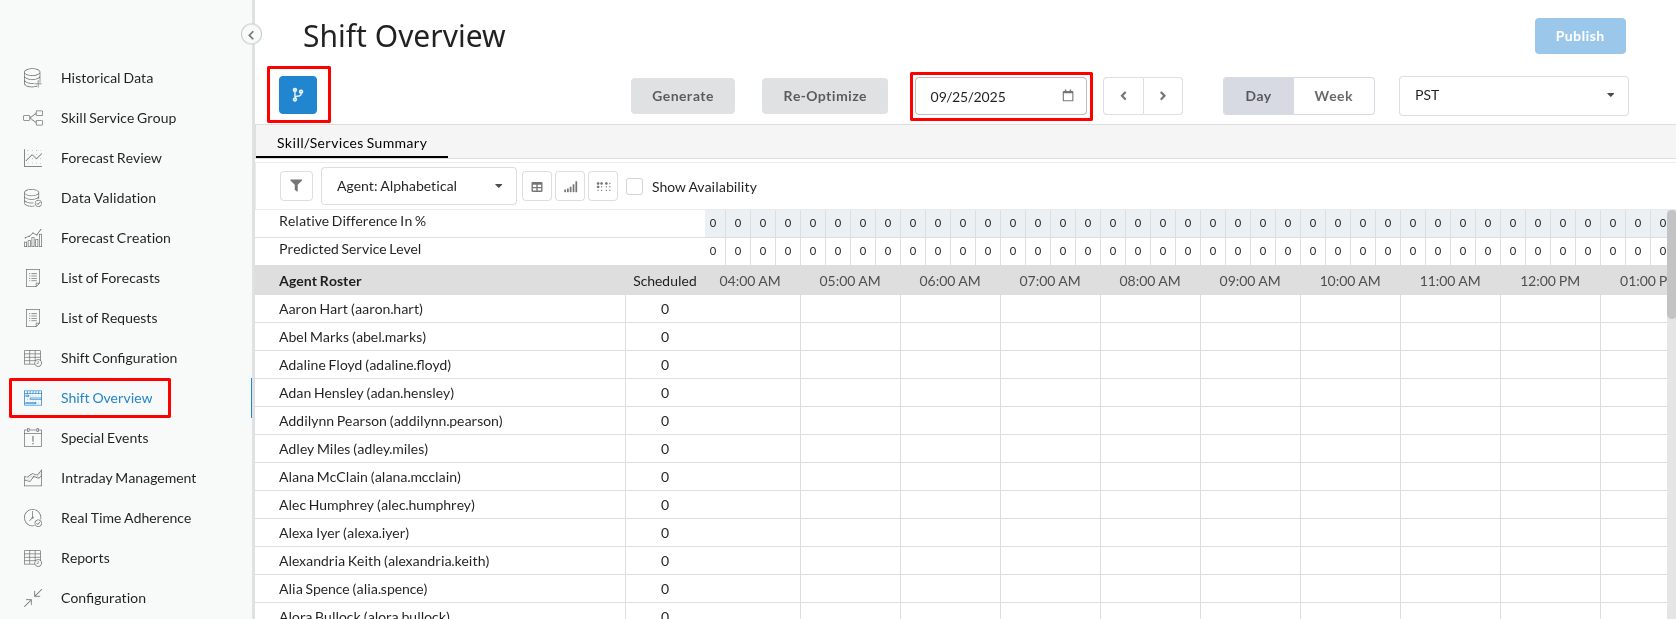
- Navigate to Shift Overview, use the calendar
 to select the timeframe, then click the Scheduling button
  to select the group of agents whose schedules you want to review or generate.
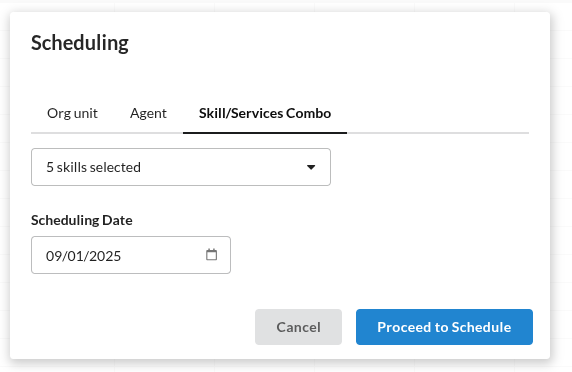
- Select the scope of agents for schedule generation: specific agents (Agent tab), all agents with certain skills (Skill/Services Combo tab) or an organizational unit (Org unit tab). Select the date for the schedule to begin and click Proceed to Schedule.
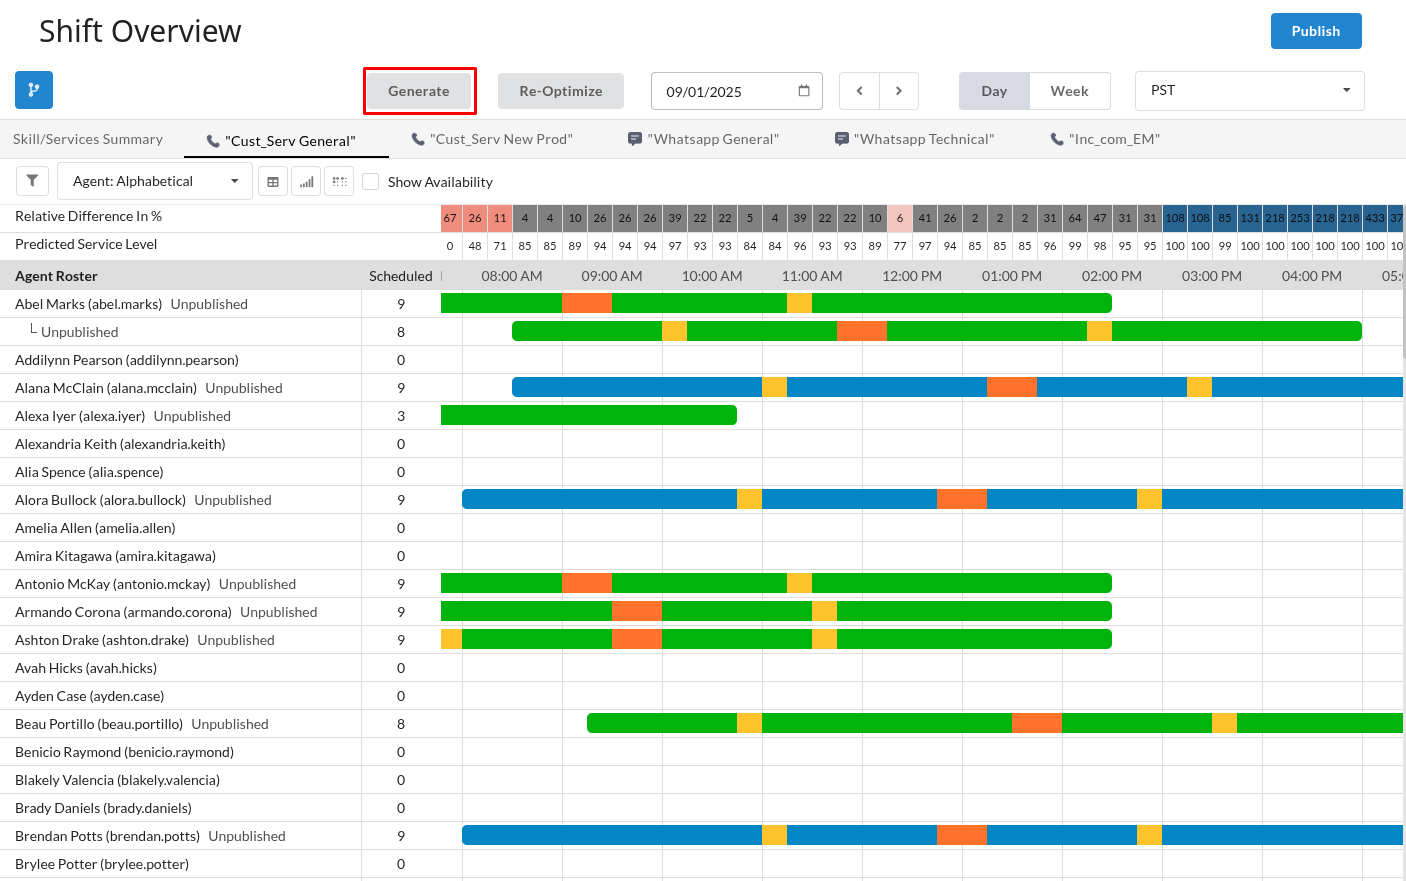
- Click the Generate button to create an initial schedule based on the forecasted staffing requirements and the configured shift templates
The following sections explain how to review staffing levels and edit individual shifts.
2. Review Schedule
The shift overview page shows a timeline of shifts and a comparison of the required (forecasted) versus scheduled agents for each 15-minute interval (Day view) or each day (Week view).
- The Skill/Services Summary tab displays the combined information for all selected skills/services. Tabs for each skill/service allow you to focus on a specific one.
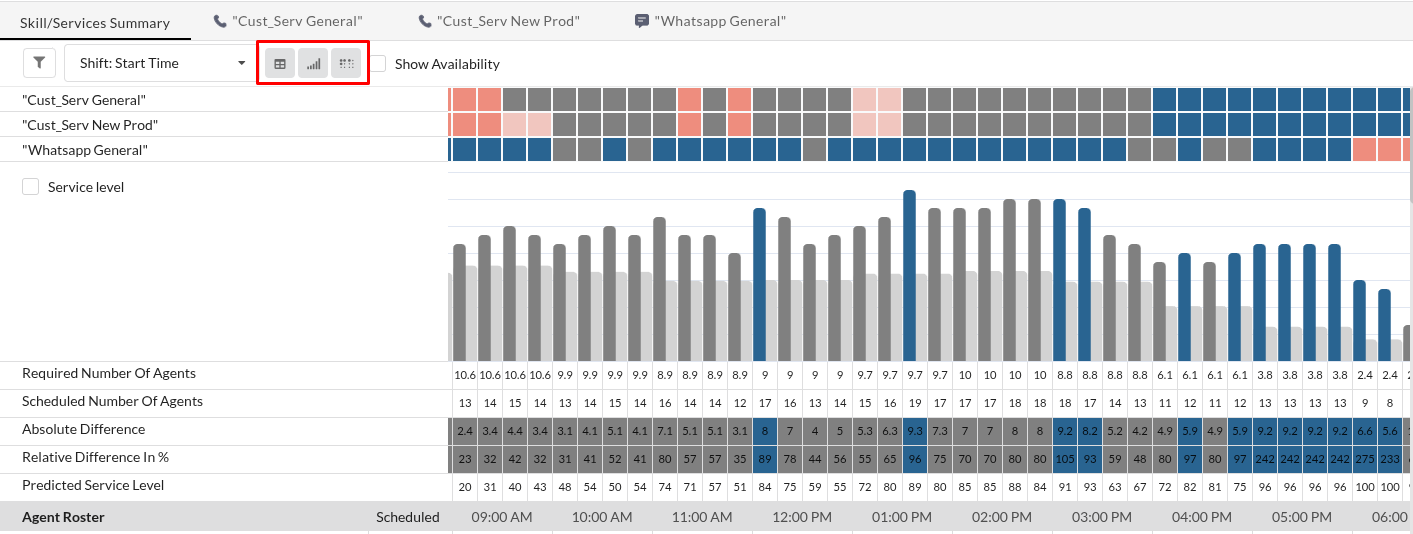
- Toggle any of the three forecast comparison visualizations to see which intervals are overstaffed (shades of blue), understaffed (shades of red), or closely match the required staffing (gray):
- Heatmap: Shows the staffing levels of all skill/services simultaneously for each interval.
- Bar Chart: Graphs the forecasted need next to the number of agents scheduled at each interval.
- Table: Includes the forecasted needs, scheduled staff, absolute and relative difference between them, and the predicted service level.
- Heatmap: Shows the staffing levels of all skill/services simultaneously for each interval.
- Toggle between Day (single day timeline with 15-minute intervals) and Week (week timeline with day-long interval) views. The timezone defaults to your own, but can be changed to any timezone you have configured.
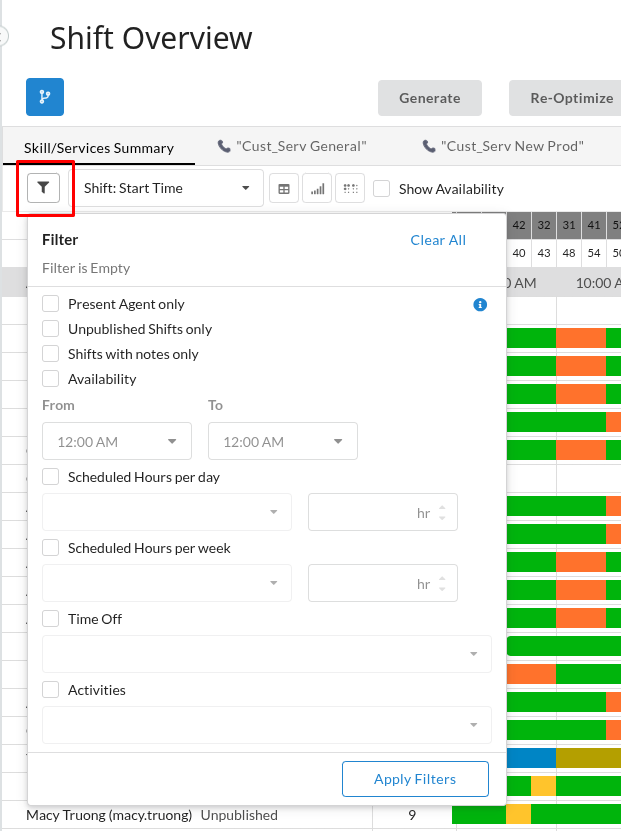
- Filter the agents displayed in the roster by criteria such as presence, scheduled hours, skill level, or specific activities.
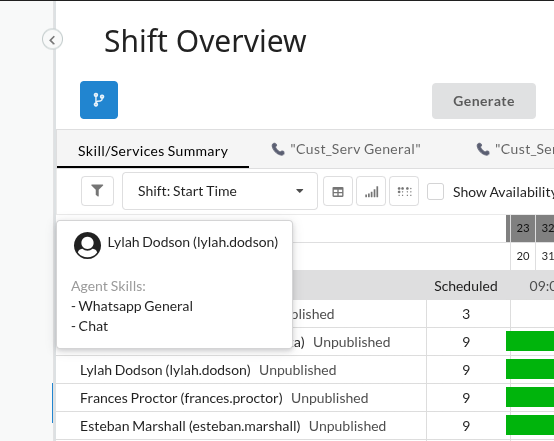
- Hover over an agent's name to see their skills.
3. Manual Adjustments
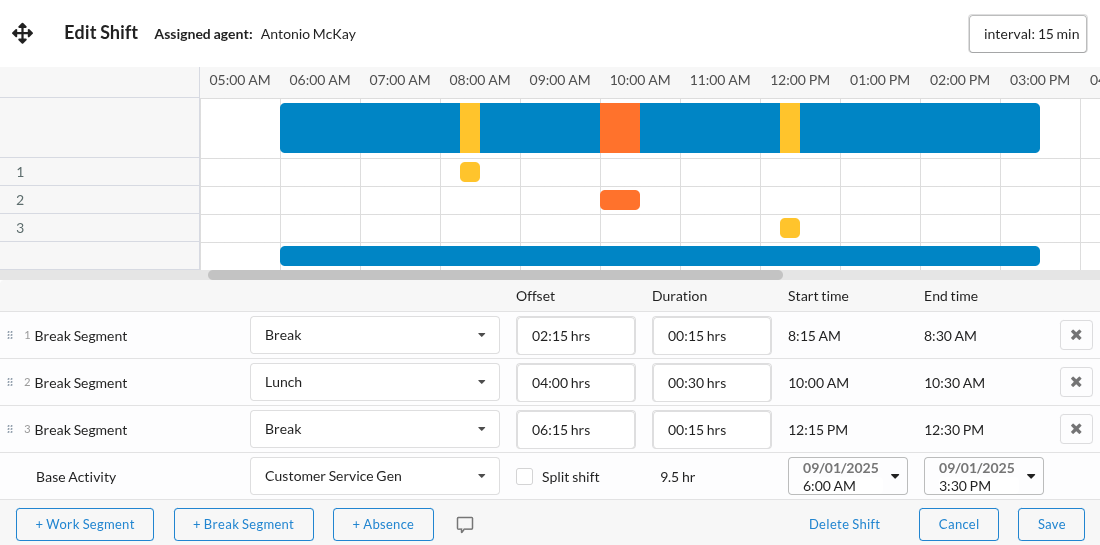
To adjust the start and end time of a shift, you can click and drag the entire shift horizontally within the main overview grid. For more detailed modifications, click on an agent's name to open the Shift Editor.
The Shift Editor allows you to:
- Graphically Adjust Segments: Click and drag segments (like base activity, breaks, or lunches) to change their timing. By default, adjustments snap to 15-minute intervals, but this can be set to smaller increments.
- Edit Segment Details in Table: Modify the start time, end time, or offset of shift segments directly in the corresponding table within the editor.
- Add or Remove Segments:
- Add new work segments or break segments. Their location in the shift is defined by an offset from the shift start time and a duration.
- Add absence segments (e.g., PTO, sick leave). These segments are defined by a specific start/end time or as a full-day absence. The start and end times of a partial-shift absence must be within the timeframe of the base activity.
- Delete segments; if a break or lunch that overlays the base activity is deleted, a gap will not be created as the base activity layer remains.
- Add new work segments or break segments. Their location in the shift is defined by an offset from the shift start time and a duration.
- Manage Segment Layers and Priority:
- Shifts are built in layers: a base activity (e.g., "WhatsApp") overlaid with segments like breaks and lunches. The base activity has the lowest priority.
- If segments overlap (e.g., a training segment and a break), you can change their priority by dragging them up or down in the segment list. The segment higher in the list takes precedence. For instance, a break can be prioritized to overlay a training segment.
- Time off (absences) always has the highest priority and will overlay all other segments and the base activity.
- Shifts are built in layers: a base activity (e.g., "WhatsApp") overlaid with segments like breaks and lunches. The base activity has the lowest priority.
To add notes providing context for adjustments (e.g., explaining manual changes or excused absences), click the note icon ![]() in the shift editor.
in the shift editor.
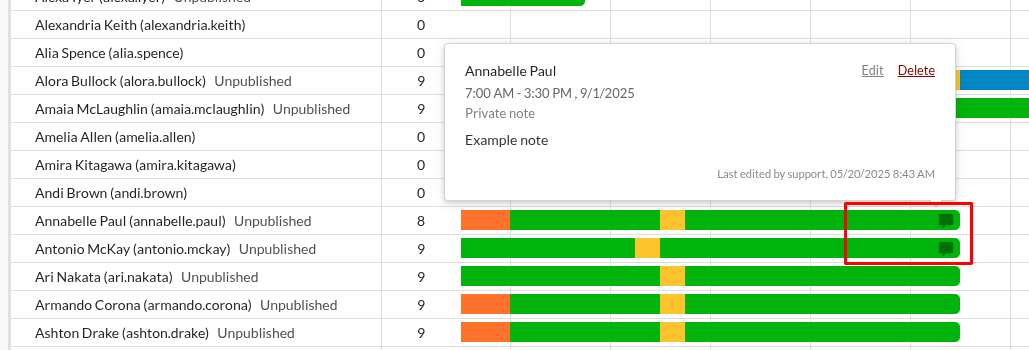
Notes marked as private are visible only to planners, whereas public notes are displayed to the agent as well. The default note type can be set in the configuration.
A filled-in note icon on the shift bar indicates an existing note; hovering over it displays the content and allows for quick edits or deletion.
4. Re-optimize Breaks and Lunches
If manual adjustments to shifts, such as adding time off or assigning off-phone work, create understaffed intervals, you can click the Re-Optimize button. The system will attempt to improve staffing levels by repositioning breaks and lunches within their allowed windows.
5. Publish Shifts
After generating and refining the schedule, you need to publish the shifts to make them visible to agents in their calendars. Click the Publish button and choose the agents whose shifts should be published.
| If you edit a shift that has already been published, it will return to a draft state and must be published again for the agent to see the updated version. | ||

