How to Customize Metrics Views
Depending on your permissions, you may be able to customize Campaign Operator tables by removing undesired metrics, adding other metrics that you may want to see, and changing the order in which metrics are arranged in the table. You may also be able to set such a customized view as a default view for all other campaign operators in your contact center.
Create Custom Views
To begin, select a campaign from the Campaigns table, then click the Manage Columns icon ![]() above and to the right of the table you want to modify. A pop-up window will appear listing all available metrics for that table.
above and to the right of the table you want to modify. A pop-up window will appear listing all available metrics for that table.
Note that the Campaigns and individual campaign tables display campaign, list, and (for voice campaigns) agent metrics, while the Lists table displays only list metrics.
The Manage Columns window allows you to rearrange, add, remove, and rename the columns of the selected table.
Rearranging Columns
To reorder the columns in the table, click and drag rows within the Order Metrics section of the pop-up window to the desired locations.

To reorder the top-level columns (e.g. Campaign, Outbound Daily, etc.) in the table, enable the Toggle grouping switch. Then, click and drag the rows in the Order Groups section to the desired locations. This option is available for the Campaigns and Lists tables.

Adding and Removing Columns
In the pop-up window, select a checkbox to add that metric to the table, or deselect it to remove that metric from the table.

Renaming Columns
Hover your cursor over a metric in the pop-up window, then click the pencil icon to rename the corresponding column in the table. Note that the original name will appear below the new name in the Manage Columns window, as well as in the tooltip.

Saving Changes
- Once a table's columns are configured to your liking, press Save in the bottom right of the pop-up window.
- Optional: Repeat for the other two tables on the page.
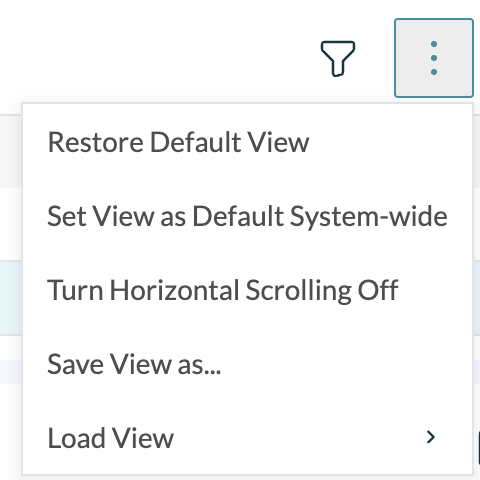
- Once all tables are configured to your liking, click on the Manage Views button at the top of the page.
- Select Save View as... from the drop-down menu.
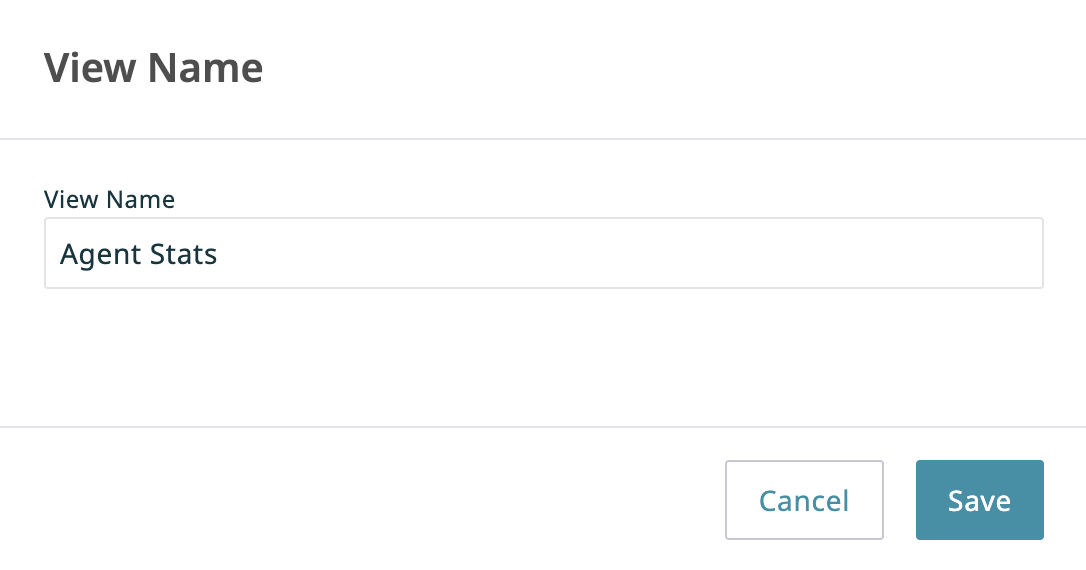
- Name the new custom view in the View Name pop-up window, then click Save.

Load Custom Views
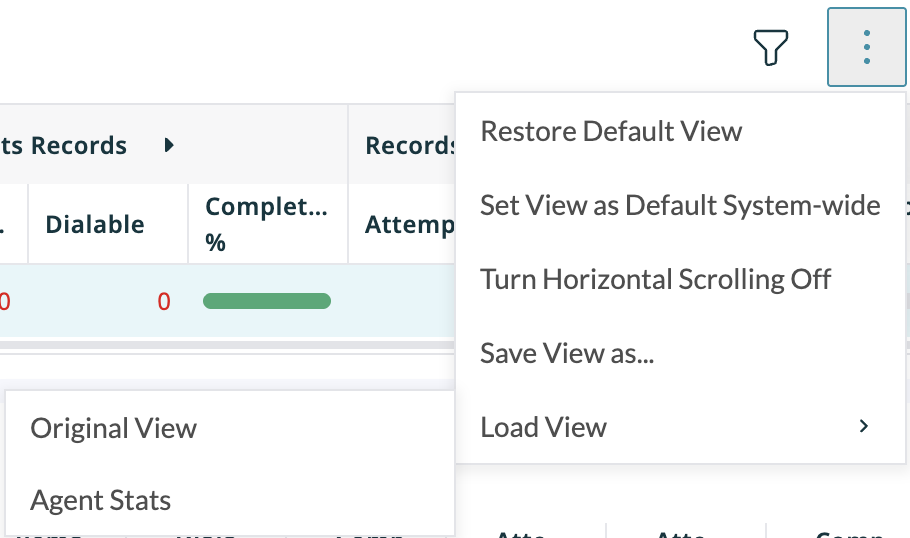
- Click on the Manage Views button at the top of the page.
- Select Load View from the drop-down menu.
- Select the desired option from the sub-menu that appears.

Default View
If desired, click Manage Views > Set View as Default System-wide to set a custom view as the default view for all other campaign operators in your contact center. Note that this function requires a separate permission.

You can also restore the shown metrics to the original presets by clicking Manage Views > Restore Default View.