Logging in to Agent Desktop 2.0
Bright Pattern's Agent Desktop 2.0 application can be launched from any supported web browser, including Chrome, Firefox, Safari, and Edge.
Once enabled by your service provider, Agent Desktop 2.0 can be accessed via the direct URL path /agent (e.g. https://<contact center URL>/agent). Login, logout, and first-time startup procedures are identical to the legacy Agent Desktop.
To log in to Agent Desktop 2.0, you will need to know the following:
- Your contact center's domain (e.g. yourcompany.brightpattern.com)
- Your username (e.g. "christy.borden")
- Your password
Step 1: Enter Login Credentials
- Open your web browser and type in your contact center's URL: https://<your contact center>.brightpattern.com/agent For example: https://example.brightpattern.com/agent
- In the Username and Password fields, enter the username and password provided to you by your system administrator. Do not change other fields of the dialog box unless instructed to do so by your system administrator.
- Click the Log in button.

Step 2: Confirm Permissions and Change Password (if Needed)
If this is your first time logging in to Agent Desktop 2.0, you may be asked to confirm your permission to show notifications from this web page. Confirm your permission to display notifications.
If you forgot your password, you may request it by clicking the Forgot? link. Password recovery instruction will be sent to you by email. Note that in order to receive those instructions, your email address must be associated with your user account in the Bright Pattern Contact Center Administrator system. If in doubt, contact your administrator to have your password reset manually.
Once logged in, you can change your password via the settings menu in the top right corner of your application screen.
How to Change Your Password
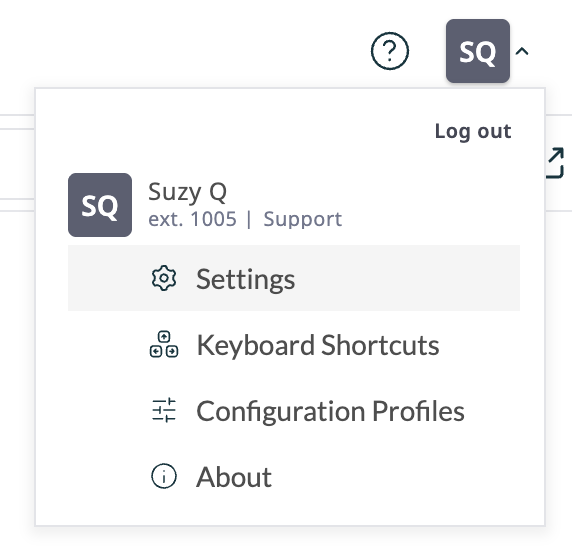
- Click your user icon in the top right corner of the page. This icon displays your profile photo or initials.
Note: Hover your cursor over your photo or initials to display your name, team, and extension number. - Select Settings from the drop-down menu.
Click on Settings to change your password - In the Profile section, click Change Password.
- Enter your current password and new password in the Password Change pop-up window.
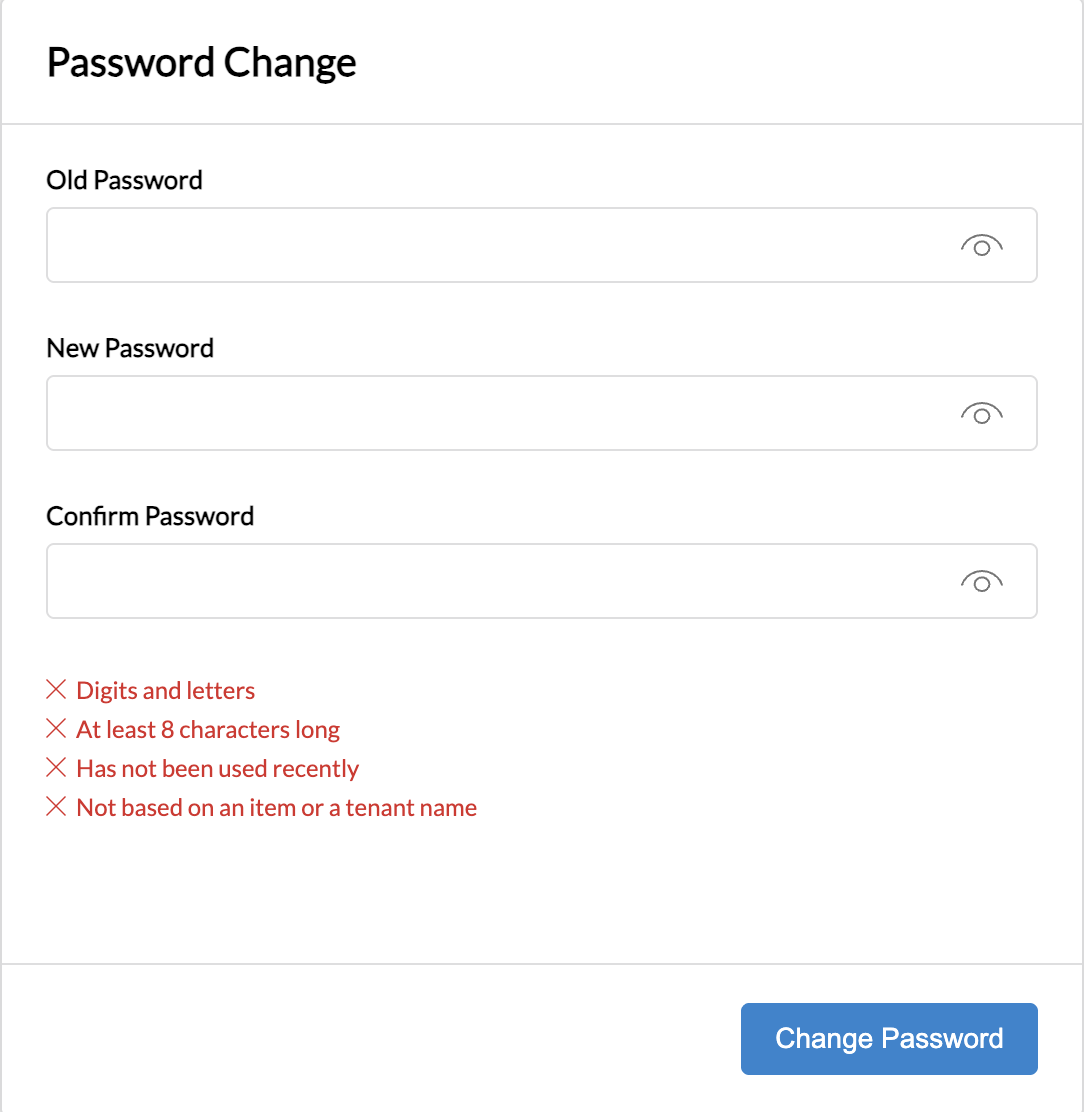
Password Change pop-up window - Press Change Password.

Depending on your contact center security policies, you may also be required to change your password upon initial login and/or at regular time intervals (e.g. every 90 days).
Successfully logging into the Agent Desktop 2.0 application marks the beginning of your working session. Your current status will be displayed in the upper-left corner of the application screen.
If you are an agent, depending on your contact center practices, you may be assigned either the Not Ready or Ready state upon login. If the Not Ready state is assigned, you will not receive any service calls until you manually change your state to Ready. If the Ready state is assigned, you may receive an interaction immediately upon login. See How to Interpret Your Current State for more information about the agent states and how to change them.
For more information, see Agent Desktop 2.0 User Interface.